시작
그동안은 티스토리나 벨로그를 사용하며 공부한 내용을 정리해 왔는데, 보다 새로운 방법으로 정리를 하고 싶어져 블로그를 직접 만들어 보고 싶은 생각이 들었다. 블로그를 만드는 방법에는 여러 가지가 있지만, 그 중 SSG의 Hugo를 사용하기로 결정하였다 !
SSG(Static Site Generator란?
정적 사이트 생성기(=SSG)는 정적 웹 페이지를 쉽게 생성해주는 프레임워크
대표적인 SSG로는 Hugo, Jekyll, Gatsby 등이 있다.
특히 Hugo는 Go언어로 만들어져 속도가 아주 빠르고, 마크다운 기반으로 컨텐츠를 작성할 수 있다.
Hugo를 사용한 블로그 만들기
1. 먼저, 아래 코드를 사용해 mac OS에 Hugo를 설치해주자.
brew install hugo
2. 설치가 완료되면 프로젝트를 생성해준다.
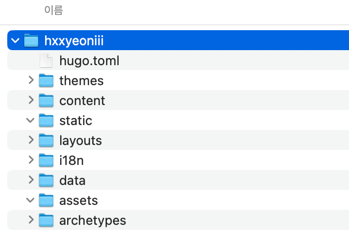
hugo new site hxxyeoniii
프로젝트가 생성되었다면 다음과 같은 구조를 확인할 수 있다.
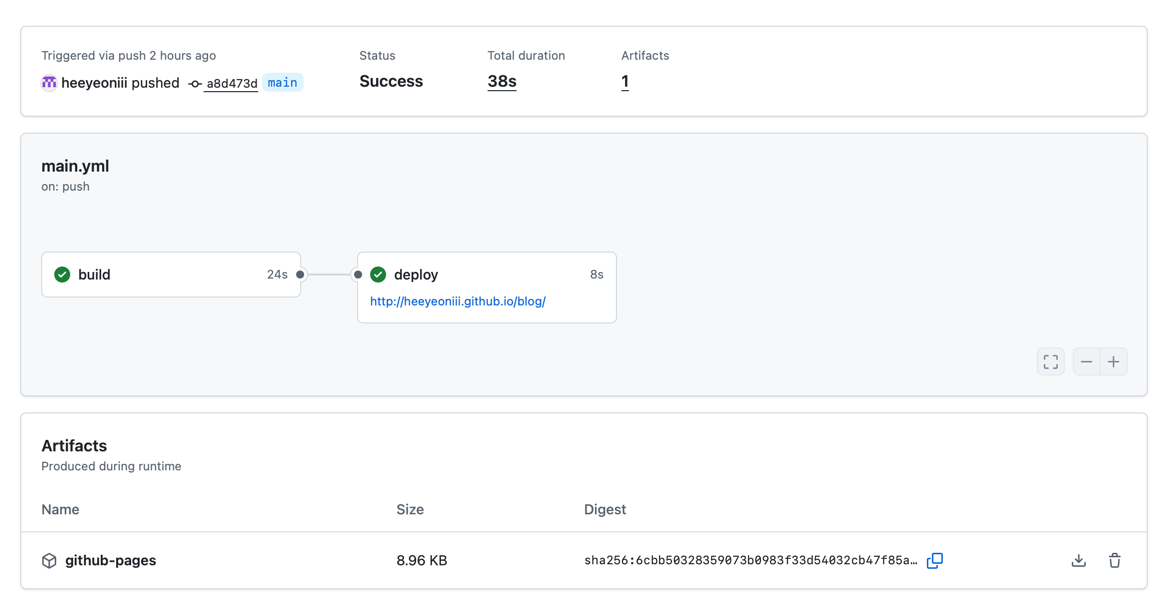
3. git에서도 배포 시 사용할 repository를 하나 생성해준다.
그리고 CI 시 사용할 workflow를 등록해준다.
name: Deploy Hugo site to Pages

on:
  push:
    branches:
      - main
  # Actions 탭에서 수동 실행 허용
  workflow_dispatch:

# GitHub Pages에 배포할 수 있도록 권한 설정
permissions:
  contents: read
  pages: write
  id-token: write

# 한 번에 하나의 배포만 허용하며, 실행 중인 작업과 최신 대기 작업 사이에 있는 작업은 건너뜀
# 단, 실행 중인 작업은 취소하지 않음 (배포 완료를 허용하기 위함)
concurrency:
  group: "pages"
  cancel-in-progress: false

# 기본 셸을 bash로 설정
defaults:
  run:
    shell: bash

jobs:
  # 빌드 작업
  build:
    runs-on: ubuntu-latest
    env:
      HUGO_VERSION: 0.149.0
    steps:
      - name: Install Hugo CLI
        run: |
          wget -O ${{ runner.temp }}/hugo.deb https://github.com/gohugoio/hugo/releases/download/v${HUGO_VERSION}/hugo_extended_${HUGO_VERSION}_linux-amd64.deb \
          && sudo dpkg -i ${{ runner.temp }}/hugo.deb
      - name: Install Dart Sass
        run: sudo snap install dart-sass
      - name: Checkout
        uses: actions/checkout@v4
        with:
          submodules: recursive
          fetch-depth: 0
      - name: Setup Pages
        id: pages
        uses: actions/configure-pages@v5
      - name: Install Node.js
        run: "[[ -f package-lock.json || -f npm-shrinkwrap.json ]] && npm ci || true"
      - name: Build with Hugo
        env:
          HUGO_CACHEDIR: ${{ runner.temp }}/hugo_cache
          HUGO_ENVIRONMENT: production
          TZ: Asia/Seoul
        run: |
          hugo \
            --gc \
            --minify \
            --baseURL "${{ steps.pages.outputs.base_url }}/"
      - name: Upload artifact
        uses: actions/upload-pages-artifact@v3
        with:
          path: ./public

  # 배포 작업
  deploy:
    environment:
      name: github-pages
      url: ${{ steps.deployment.outputs.page_url }}
    runs-on: ubuntu-latest
    needs: build
    steps:
      - name: Deploy to GitHub Pages
        id: deployment
        uses: actions/deploy-pages@v4
4. 아래 페이지에서 사용할 Hugo 테마를 고르고, 사용할 깃 저장소에 clone 해준다.
나는 깔끔한 PaperMod를 선택하였다. -> https://themes.gohugo.io/themes/hugo-papermod/
5. Hugo의 핵심 파일 중 하나인, hugo.toml 파일을 수정한다.
해당 블로그의 이름, 테마, 배포 위치, 언어 등을 설정해주는 것이다.
baseURL = "https://heeyeoniii.github.io/blog/"
languageCode = "ko-kr"
title = "hxxyeoniii"
theme = "hugo-PaperMod"
6. GitHub Pages에 배포를 진행한다.
git add . // 변경 내역 스테이징에 올리기
git commit -m "블로그 글 작성" // 글 작성 후 커밋
git push origin main // 원격 저장소에 푸쉬 -> 자동 빌드됨